Wednesday, November 7, 2012

Halloween Cake Pops!!

Hi Everyone!
I hope everyone is doing well after Hurricane Sandy. I had to delay my post because of the weather, and school has been crazy.
So here is the long awaited Cake Pops!

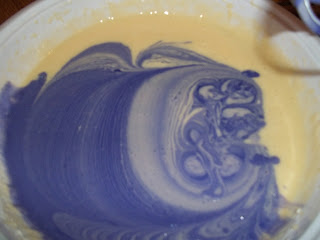
First, you need to make a cake. I was lazy so I used a boxed cake mix. And cause its Halloween, I adding purple food coloring to the mix. ( I just really like this picture :D )


 The next step is to put it in a sprayed baking pan. Then bake as directed on the box. (See the toaster oven?)


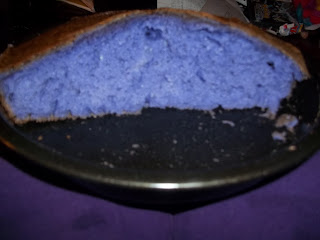
When it's finished baking, it should look something like this.


This picture was taken to try to show you the color of the finished cake.


The, you can either break up the cake with your hands, a fork, or you can put it in the food processor. I like using the food processor, because I feel it provides the nicest crumb.


I pulsed it on the food processor until it looked like this.


 Then I dumped it all in a big bowl.


After putting it in a bowl, you add the frosting. I used orange colored vanilla frosting for the Halloween theme. The amount of frosting depends on your cake. Mine was moist, so I used a little less than half the jar of frosting.

Next is the fun part. You get to mix the frosting with the cake! I always use my hands, but you can use a spoon if you want.


Then, roll the cuties into little balls. Then, stab them with a stick while your candy coating is melting. Then, dip the sticks in the coating and insert them into the holes you already made.  Put them on a papered tray and put in the fridge for a few hours, to over night.


You can now melt your chocolate, and add coloring to it if you want. I made white ghosts (not pictured) and pumpkins. You carefully dip your cake pop into the melted chocolate, and tap it to let any extra coating drip back into the pan. You can set them down, or use something to hold them up to dry. While they were still wet, I added sprinkles for eyes!


Ingredients:
1 box cake mix. I used french vanilla.
1 jar frosting
Sticks
Candy coating/chocolate (I used vanilla almond bark)
Oil (about 1 tsp, because the coating was too thick)
Sprinkles!

Enjoy!
Monday, October 22, 2012

My Break From Baking

Hi Everyone!

I've had to take a break from baking because our oven is completely, 100%, broken. Do you know how hard it is to not be baking? Well, my wonderfully awesome Mom went and bought a toaster oven!! Since its a convection oven, I've been able to bake cakes. I haven't posted them because I really didn't know if it would even work. So far, I've baked a total of 24 cake pops (my first two attempts!), and a 2 layer chocolate cake. So, expect some awesome pictures and recipes within the week!

Thursday, September 27, 2012

Macaroons!

Ok. So I decided to try Macaroons. I know, I know, their really hard to make and blah blah blah....
I found that they are not that hard, and taste REALLY yummy!

 So, here is a picture of the finished tops. They had PERFECT feet! On my first try!
 I then made a chocolate ganache. Believe it or not, but I had more trouble making the ganache, than the cookies themselves.
 Aren't they just beautiful? They tasted even better than they looked.

I got the recipe on http://www.giverslog.com/?p=1089

Enjoy!

Saturday, March 31, 2012

Chocolate croissants

Hi everyone!

A few days ago, me and my friend wanted to try to make chocolate croissants. I'll admit, we kind of cheated, but they were so good!

Here's a picture of the finished croissants.

Ingredients:
1 package puff pastry dough
1 bar of dark chocolate
1 egg

Here's how we made them:

First we floured the work space and and put the thawed dough on it, then we used the rolling pin to flatten it a little.
Then we cut it into three long strips, and cut each strip into four equal pieces.
Then we cut each square in half (so it was a triangle).
Then we put some chocolate on the end of the triangle, and rolled them up.
And lastly, we put them on the cookie sheet and gave them an egg wash, and into the oven they went!

Oven temp was 425 degrees, but we turned it down to 400 degrees after we put them in the oven.

They took about 15 min to bake.

*Disclaimer: I did not create this recipe, I found it online but I can't remember where. Sorry

Thanks for reading!

Chocolate chip cookies

Hi everyone!

My friend asked me to teach her how to make chocolate chip cookies, and she was surprised about how easy it was.

Here's a picture of the cookies being put on the baking sheet.

I didn't get a chance to take a picture of the finished cookies, because we (and some other friends) ate them all before I could get my camera! But, let me tell you, they were really good!

Thanks for reading!

Royal icing cookies

Hi everyone!
A few days ago I decided to try to make royal icing. I think it turned out pretty good, and it tasted amazing on the shortbread cookies.

Here's a picture of the finished cookies.

I decided to use flood icing to frost my cookies and it was easier than I thought it would be.

Steps to decorating cookies with royal icing:

1. Bake your cookies (I made shortbread)
2. Let them cool completely! If you don't it will melt the icing, and make a huge mess.
3. Use the thick royal icing to outline your cookies, and let it dry for five minutes. (the thick icing should be like tooth paste)
4. Add water to your royal icing until its the consistency of shampoo. Then separate into bowls and add your food coloring.
5. Fill your piping bag or squeeze bottle with the flood icing.
6. Completely cover your cookies with the flood icing.
7. Let dry uncovered overnight.

I decided to try different patterns on my cookies, and as you can see, by adding more icing to the cookie, it over flowed, and made a huge mess.


Thanks for reading!

Monday, March 12, 2012

Ombre Cake

Hi, since this is my first post, I decided to post my latest project..... an Ombre Cake!


Ingredients:
2 boxes of any white cake mix (I used french vanilla)
Eggs (Make the cake as the box tells you to)
Apple sauce ( 1 cup oil or butter = 1 cup apple sauce)
Gel food coloring of your choice
water
6 cake pans

Frosting:
8 cups powdered sugar
1 cup shortening
1/2 cup room temp. butter (1 stick)
1/4 tsp. vanilla
1/8 tsp. Kosher salt
1/4 cup milk

First I started off by making the cake. I followed the box's instructions, and substituted apple sauce for the oil. Then I divided the cake batter by six, and put it into six bowls. Each bowl ended up with a little over 1 cup of batter. I then added the gel food coloring with a tooth pick, and mixed it, and I left one layer white. Then I sprayed the cake pans with baking spray, added the batter, and in the oven they went! They only took 20 minutes to bake, even though the box said it would take 30min. So, keep an eye on the cakes.

Here's a picture of the cakes after they came out of the oven


After they cooled, I wrapped them up, and let them sit over night.

In the morning, I leveled the cakes, and made the frosting.

To make the frosting, you first mix all of your wet ingredients and the salt, and then add powdered sugar two cups at a time. After it was done, I added some food coloring to it. Then I put a thin layer in between the cakes, and then I filled my piping bag, with a star tip, and made little flowers.

How easy was that?

Here's a picture of the cake after we cut it.


*You need to keep the cake in the fridge, because the frosting will melt if you don't.

Thanks for reading